Contact us at at 612-720-2063 or [email protected]

Uncategorized

Kim Lewis of Extreme Home Makeover Talks Texas Roots and Statement-Making Style

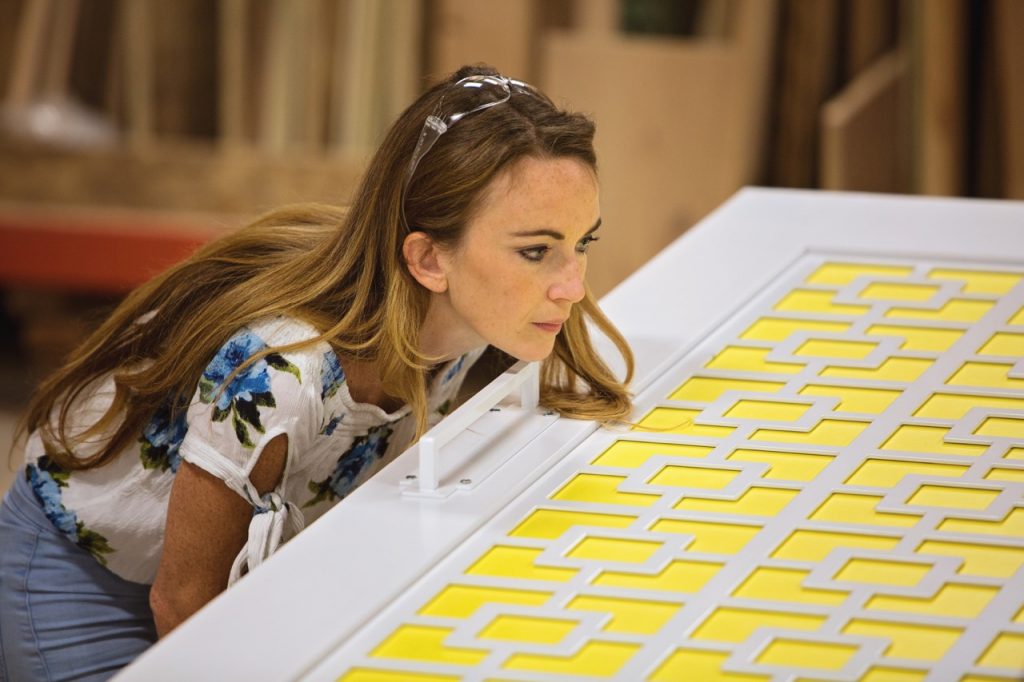
This is Kim Lewis. You might recognize her from Extreme Makeover: Home Editionor Tiny House Nation. We’re huge fans of Kim, and of her taste – and we’re also huge fans of statement doors. So suffice it to say that the doors that Kim designed for Rustica Hardware might be our all-time favorites.

Kim was kind enough to sit down with us to answer a few questions about how to incorporate super-bold design elements into an overall decor scheme…and play the Match-the-Kardashian-to-the-Door game (it’s a classic).

Hi, Kim! Tell us a little about how you got to the designing-awesome-doors part of your life?

Well, I started my design career working on ABC’s Extreme Makeover: Home Edition, and while traveling with the show I designed over 120 homes across 46 states. After that, I worked on Bar Rescue, Bakery Boss, Tiny House Nation, and some other shows. A few years ago, I decided to return to my Texas roots and start my own design company. We design restaurants, hotels and art centers around the globe, as well as tiny homes.

What inspired your collection for Rustica Hardware [pictured above]? Is there any throughline between the the three designs, or do they all just represent different looks you love? 

I’ve always believed design should take us to a time and place, and that doors have the power to set the tone. The collection is travel-inspired – each door is nostalgic, and each one reminds me of a place I love. Marfa, for example, is a quirky artist’s town in West Texas that won my heart on a glamping trip – and clearly it involved an Airstream. Palm Springs is a whimsical, retro, bold, throw-back town, and so the door evokes that ’50s vibe. And Joshua Tree was designed to evoke the sweetness and calm of watching the sun set in the California desert. I designed the pattern on the door as a nod to our Native American roots.

Kim Lewis at home with the Joshua Tree door

Come on, tell us: you must have a personal favorite. Which one would you (or did you?) put in your own house?

Of course I love them all! In my own home, I went with the Joshua Tree to match our sunset desert vibes. The light wood and white steel mix is soft and neutral, while the pattern functions as a piece of art.

The idea of a statement door can be a little overwhelming – if someone loves these doors but doesn’t know how (or where) to integrate them into their home, where should they start?

Going out on a limb and designing your own space can certainly be intimidating, but I always try to remind people that our homes should reflect our personality. Don’t be afraid to express yourself through art, architecture and color.

The best place to start is with the big picture: think of design like fashion, and pick a style you respond to. I think that every home should have some strong elements that act as conversation pieces – and adding dimensions to the walls of your home can really bring it to life. That’s why I love barn doors so much – they’re functional works of art.

We absolutely love the Marfa door’s saturated colors and unique design – can you tell us how to work with a door that statement-making without letting it overwhelm the space?

The Marfa door evokes a real sense of nostalgia and has a big personality, so we didn’t want to take away from that. Mixing materials is a good way to ensure fixtures in a design don’t “fight” each other visually.
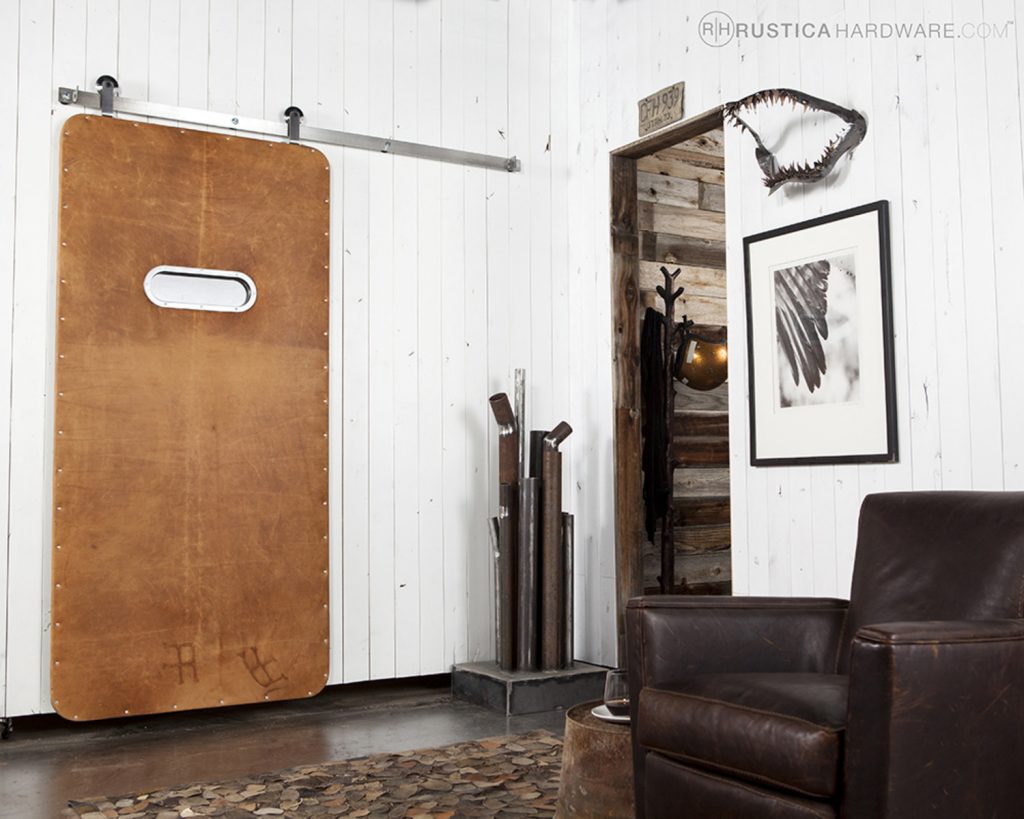
Leather Modern Range

Speed round: we’re going to name a Kardashian, and you tell us which Rustica door they’d be. You know, if they were a door.

Funny…I’m one of those people that has worked in TV for so long that I don’t watch much of it. I’ll give this my best shot…this is a no judging zone, right?

Kim.  Joshua Tree.

Khloe. Leather Modern Range.

Kourtney. Palm Springs.

Kris. Powell.

Kylie. Mirror.

Kendall.  Marfa.

Rob. Guardsman.

As a certified Kardashian Expert, that was pretty spot-on. Well done.

Check out Kim’s collection for Rustica Hardware here.

How To Make Your Trashed Outdoor Furniture Look Great Again

Changing seasons can be rough on wood.

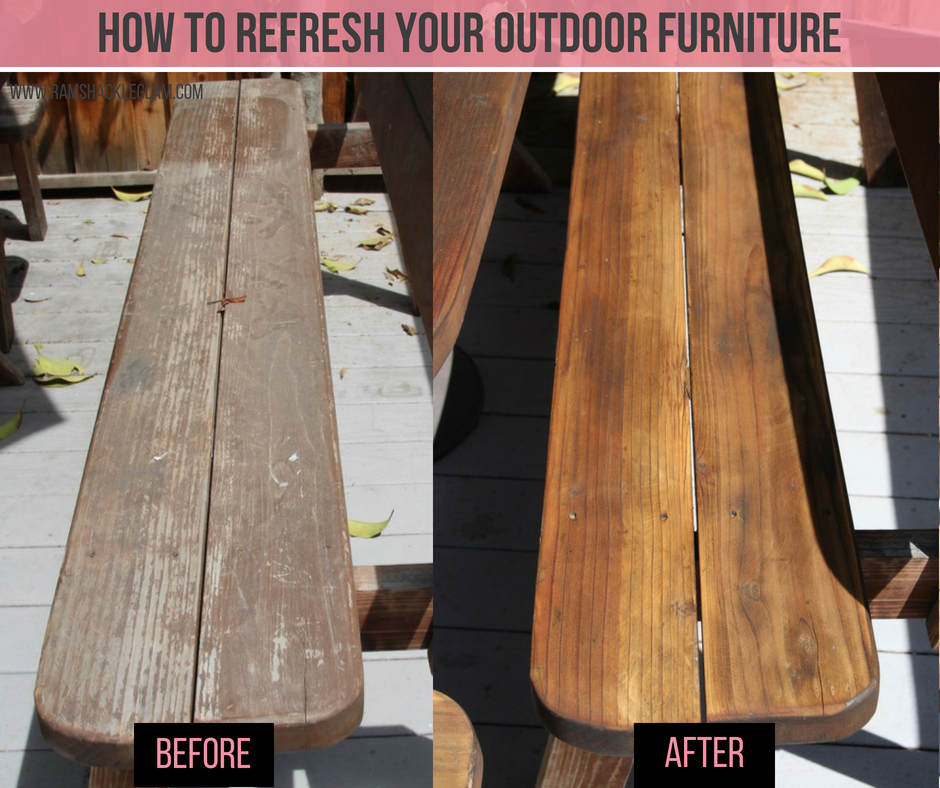
Rain is a major plus for we Californians, yes, but rain’s advantages run out when it comes to wood furniture that has been left outdoors without covers and/or additional protection. The good news: The fixing-up process requires nothing more than a power sander and some teak oil, and the results are straight-up spectacular. If you have wood furniture that’s seen better days – whether indoor or outdoor – you have to give this simple DIY a try.

HOW-TO: RESTORE WOOD FURNITURE THAT’S SEEN BETTER DAYS

What You Need:

  • A power sander (don’t use regular sandpaper if you’re dealing with a substantial surface area; a power sander will make your life far, far easier, and you can pick one up for about $25)
  • Teak oil
  • A brush or rag to apply the oil

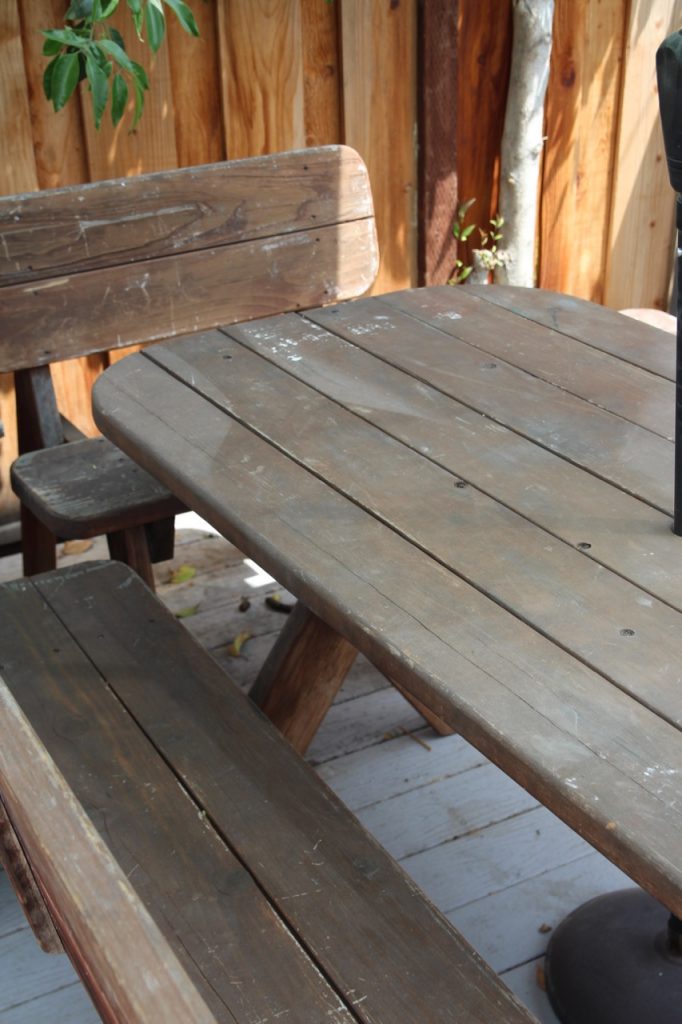
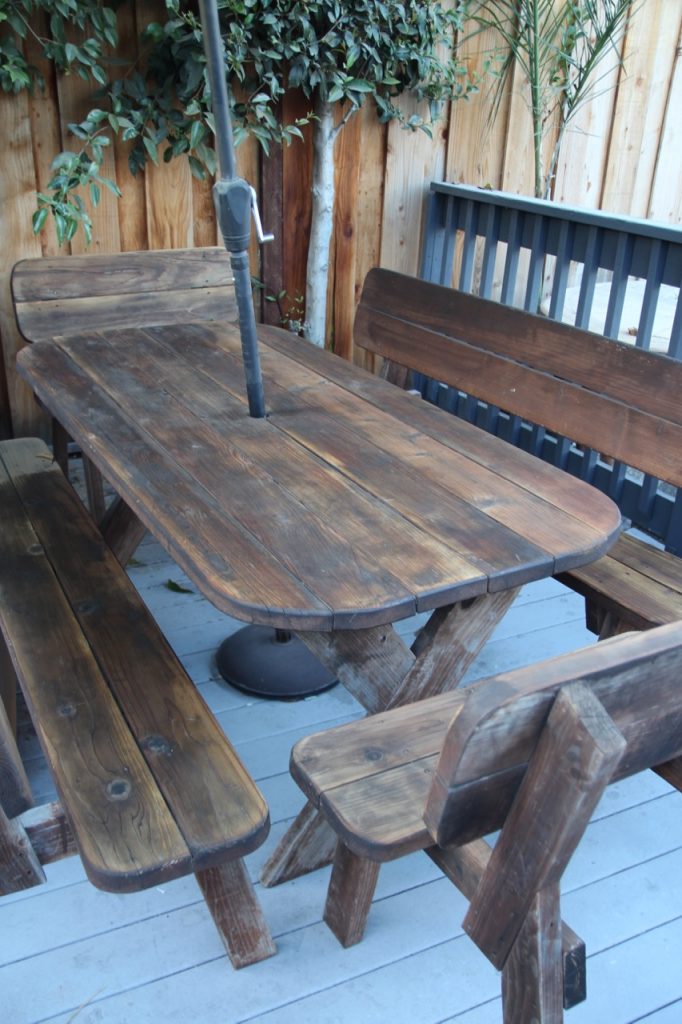
Here’s what the wood we were working with looked like after a couple of seasons of being left out in the open with no protection:

To start, you’re going to use the power sander to sand down the wood as far as you need to go to get a smooth, even surface. The table and benches you see here took about an hour and a half to sand down.

Here’s what you end up with after a thorough sanding:

The next step is the teak oil application. This is pretty self-explanatory – pour oil onto rag or brush, then apply to surface of wood – but there are a couple of important points to note.

First, the way teak oil is supposed to work is that you apply the oil, wait 30 minutes, and then wipe off any excess, but if your wood is in really bad shape, you may find that the oil absorbs completely almost instantly. If some oil remains on the surface of the piece you’re refinishing, be sure to wipe it off after 30 minutes, but either way a second application half an hour or so later is a good idea.

The second important thing to note is that you can’t leave the brush or rag you used to apply the oil outside in the sun, or it will literally catch fire. File that under: excellent information to have if you do not feel like burning down your house today.

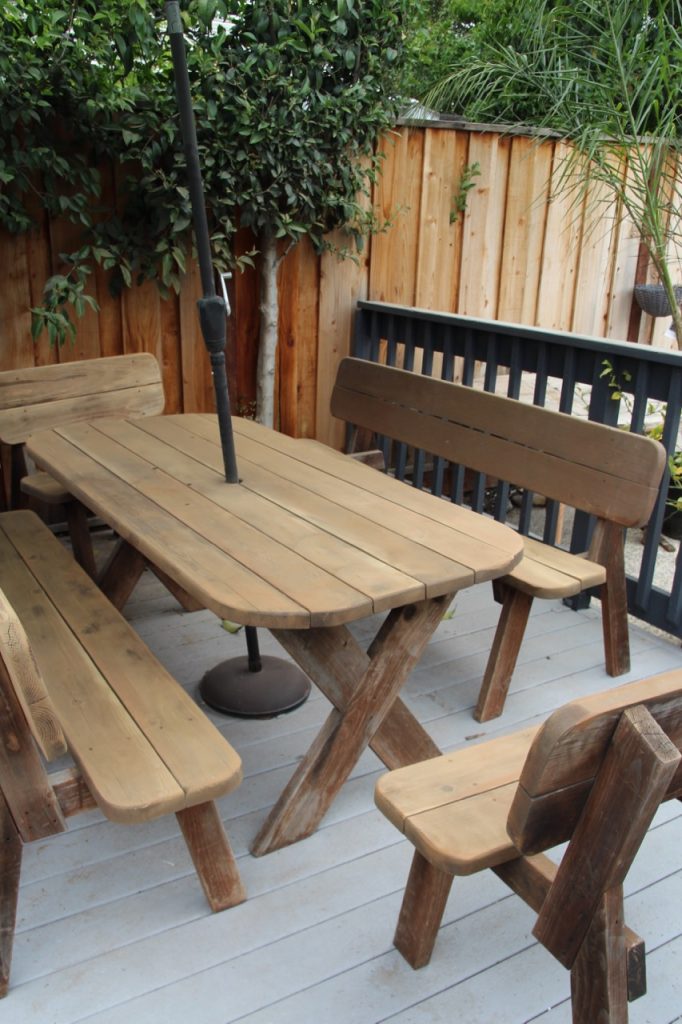
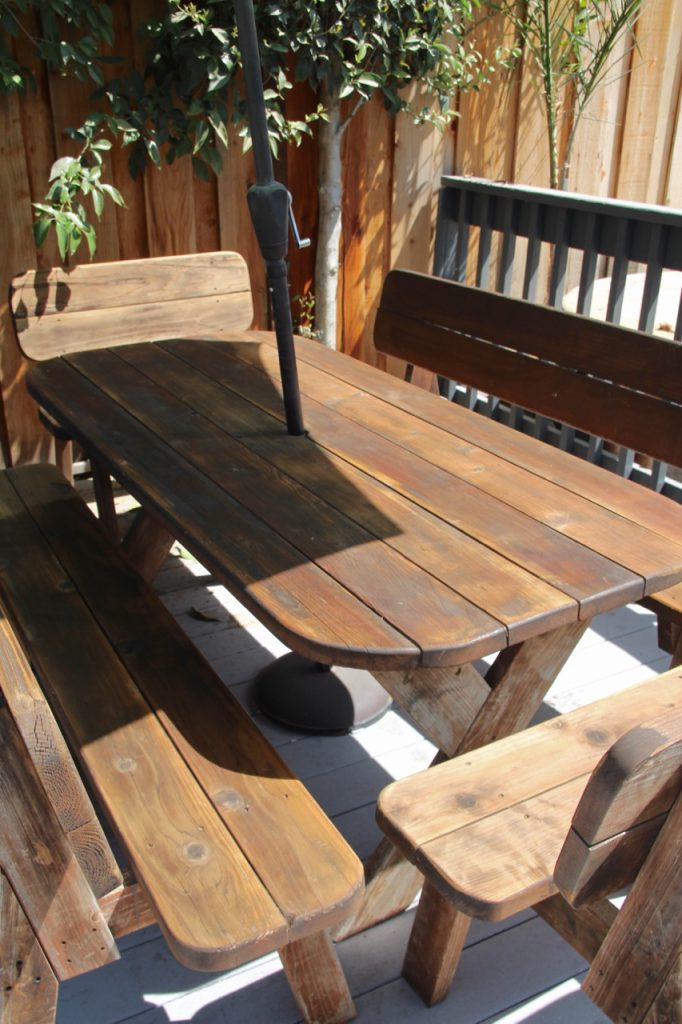
Here’s what the wood looked like immediately after applying the teak oil – you can see that it soaked in immediately, but is kind of uneven and dark.

By the next morning, however…

So. Much. Better. It’s like having a whole new set of outdoor furniture for the price of a quart or so of oil. Simple, inexpensive, and effective.

10 Spectacular Bathrooms With Encaustic Cement Tile

If you’ve been on Pinterest (or Apartment Therapy, or the Internet in general) at any point in the past five years, chances are you’ve seen shots of stunning, intricately designed floor (and wall) tiles. Featuring unique patterns, vivid colors, and a sturdy, practical texture, encaustic cement tiles crossed the pond and became hugely popular Stateside for a reason: For high-impact design, it just doesn’t get much better.

It’s important to remember that encaustic cement tile installed in a bathroom (or anywhere that it may get wet) will have to be sealed several times in order to account for its porous qualities, so make sure you consult a pro before getting your project underway.

Now let’s check out some of the most beautiful encaustic cement bathrooms out there.

ideas for encaustic cement tile in a bathroom

Modern Black & White Contrast

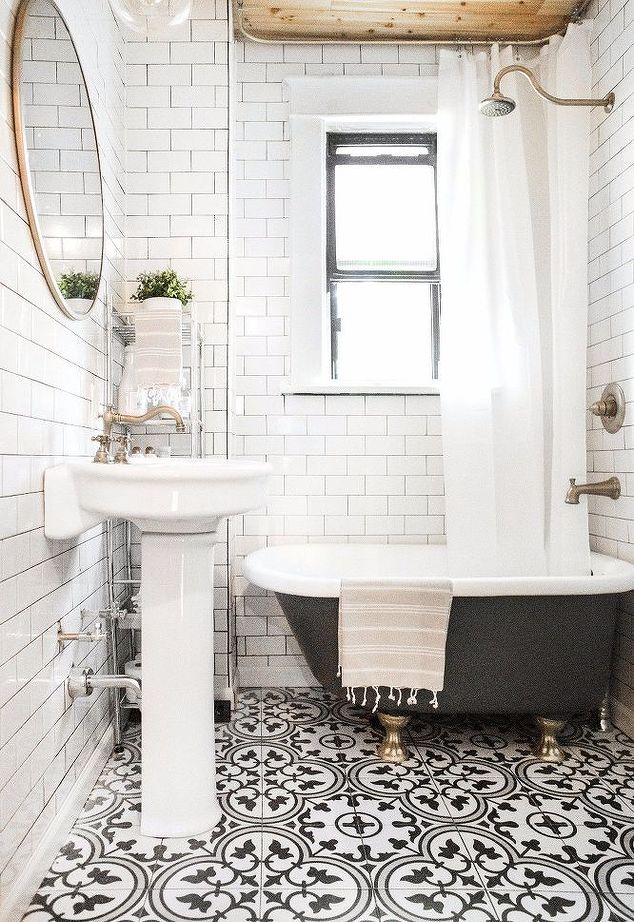
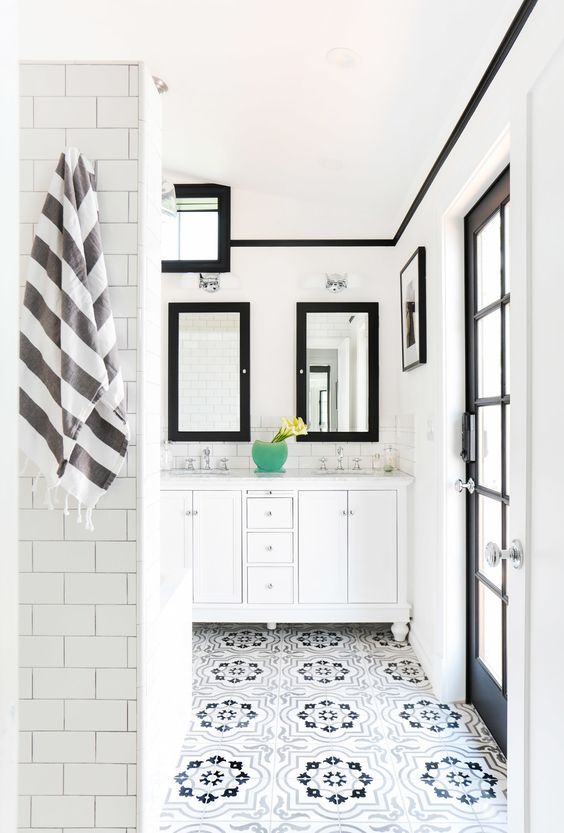
This look is visually similar to the one at the top of the post – but still feels more clean and modern. The black accent along the ceiling is super unexpected, and gives the whole room a finished feel.

ideas for encaustic cement tile in a bathroom

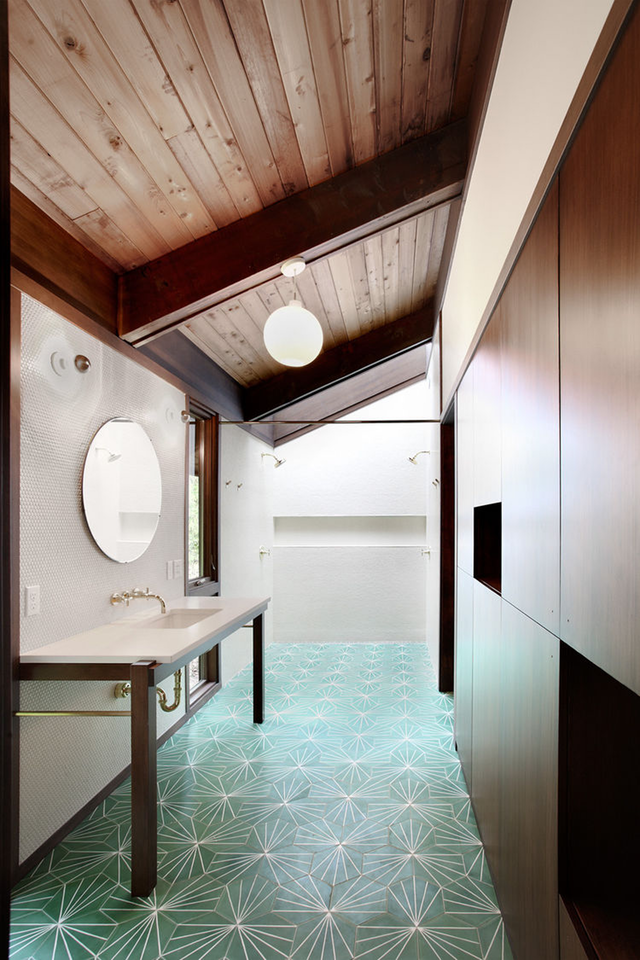
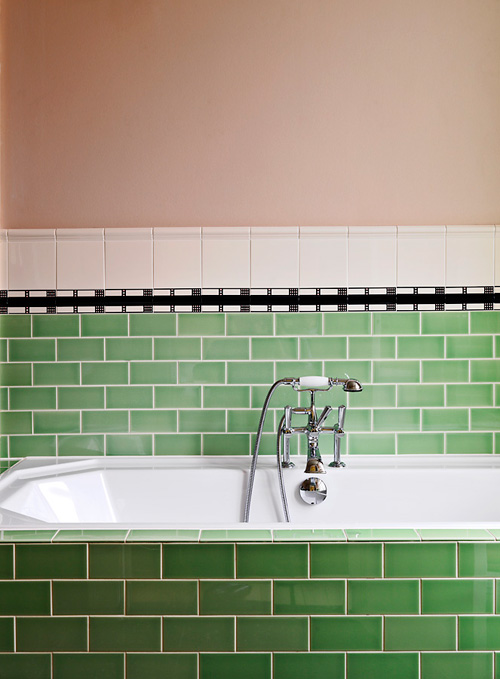
Sage Green, Gold & Copper

The pairing of the sage-y, minty green with black furnishings and copper fixtures is luxe, elegant, and totally unique.

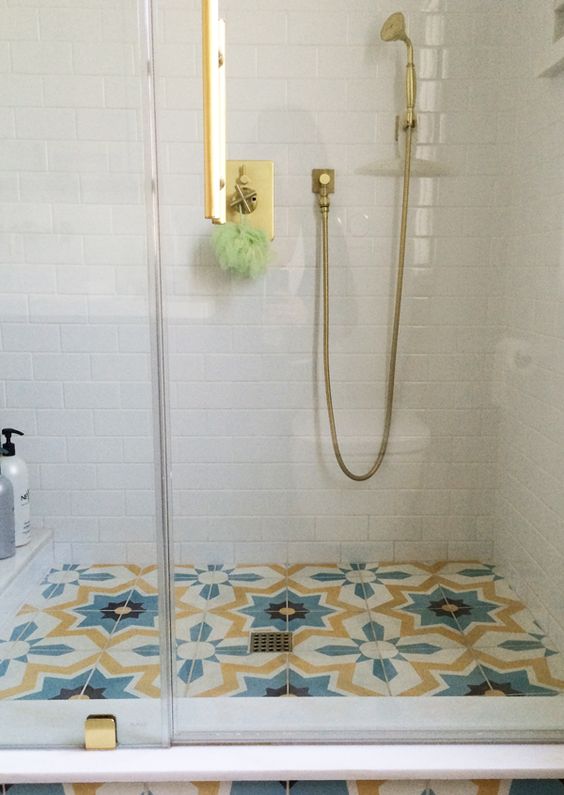
ideas for encaustic cement tile in a bathroom

Retro Blue & Yellow Floral

This is 1970s Grandma’s House, but in the very chicest of ways. The gold fixtures and muted color pairings are what make it feel fresh – not frumpy.

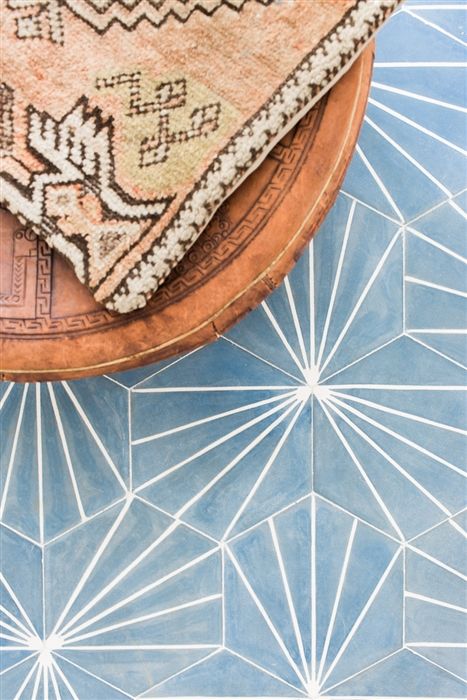
ideas for encaustic cement tile in a bathroom

Dusty Blue Stardust

This elegant, understated – yet still striking – tile recalls a beautiful spa in Santorini.

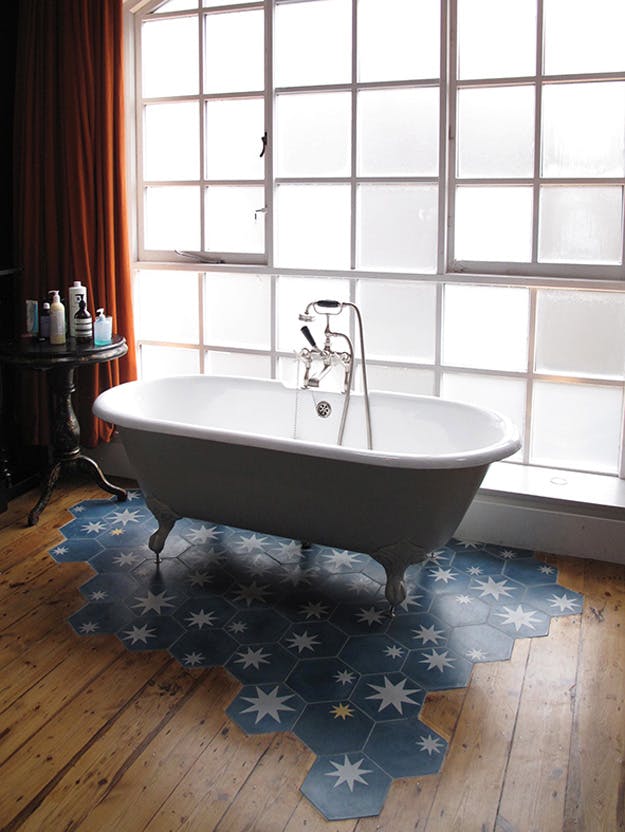
ideas for encaustic cement tile in a bathroom

Hardwood/Freehand Tile Combo

This freehand tile installation – located only where water from the tub is likely to damage the wood – is both completely unexpected and a more affordable way to incorporate encaustic cement tile into your home decor.

ideas for encaustic cement tile in a bathroom

Retro Pink & Green

This look is definitely for those who appreciate some vintage flavor, but it’s so chic, and very beachy-retro-Malibu. The pink! The emerald green! The black accents!

(It’s also not encaustic cement tile, but details, details. It needed to be seen.)

ideas for encaustic cement tile in a bathroom

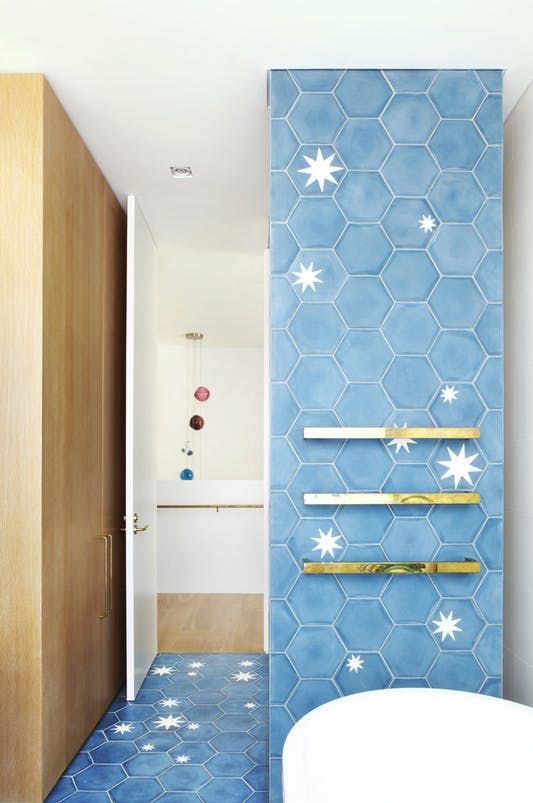
Starry, Starry Night

This is like The Little Prince via Scandinavian Design.

(That’s a compliment.)

ideas for encaustic cement tile in a bathroom

Zen Seafoam Green

Here are those sage-y starburst tiles again, but this time a more Zen/rustic space.

ideas for encaustic cement tile in a bathroom

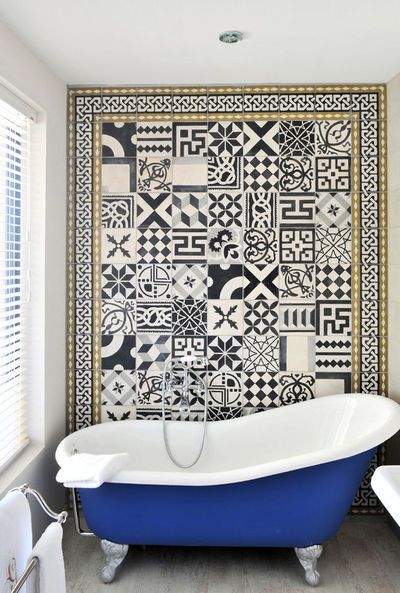
Mix-And-Match Accent Wall

A crazy, cool idea for an accent wall. And in case this looks like too much work, Villa Lagoon Tile sells “Patchwork Collections” in both black and white and multicolor.

ideas for encaustic cement tile in a bathroom

Photo by Amy Bartlam

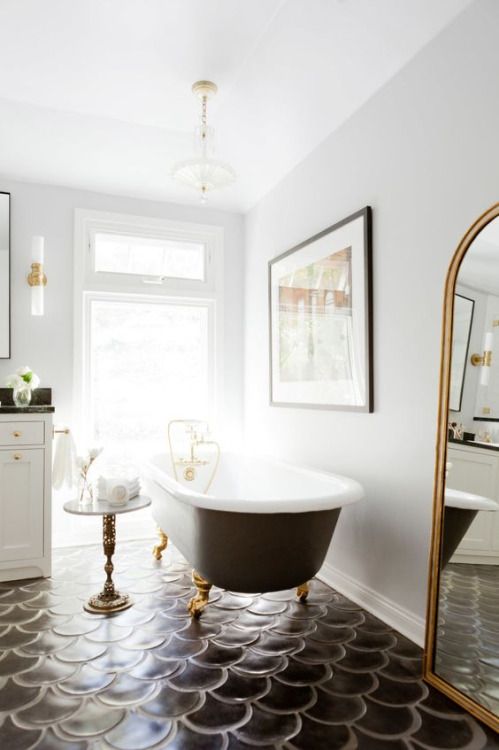
Black Fishscale

This tile is textured, unusual, and incredibly chic. Perfect for a small space, and can be finished with either a matte or high-gloss surface.

Mobile Homes Malibu Featured On Ramshackle Glam

mobile home Malibu paradise cove point dume club

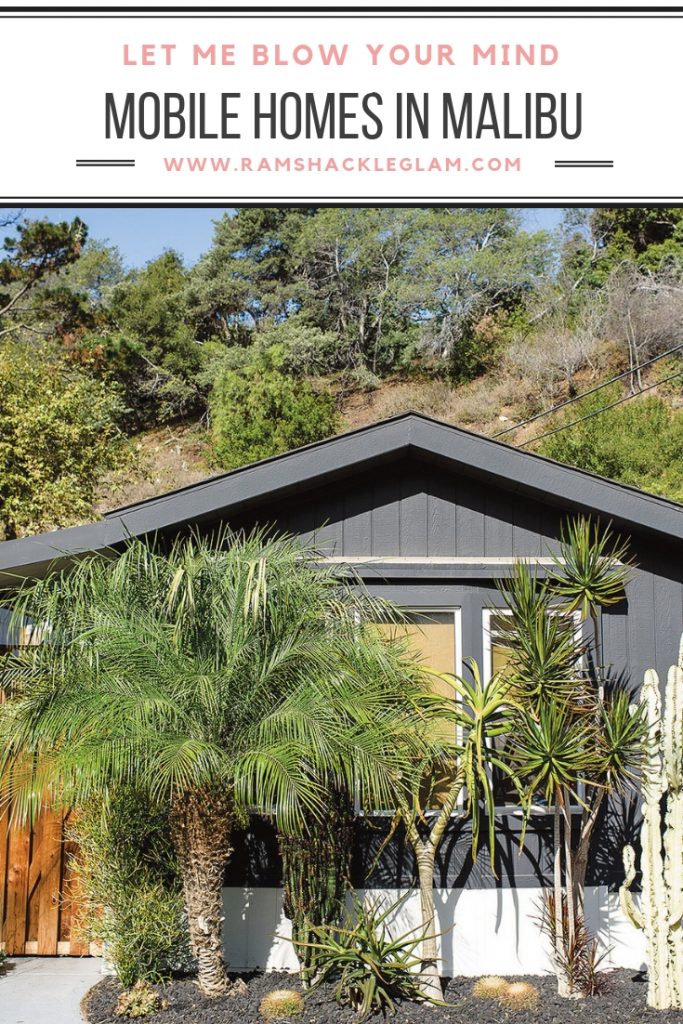
Mobile Homes Malibu was recently featured on the popular lifestyle website RamshackleGlam.com – click over to read about what makes Paradise Cove and Point Dume Club so special, and why you should consider purchasing a seaside mobile home of your very own.

How To Stage Your Home To Sell

how to stage your home for sale

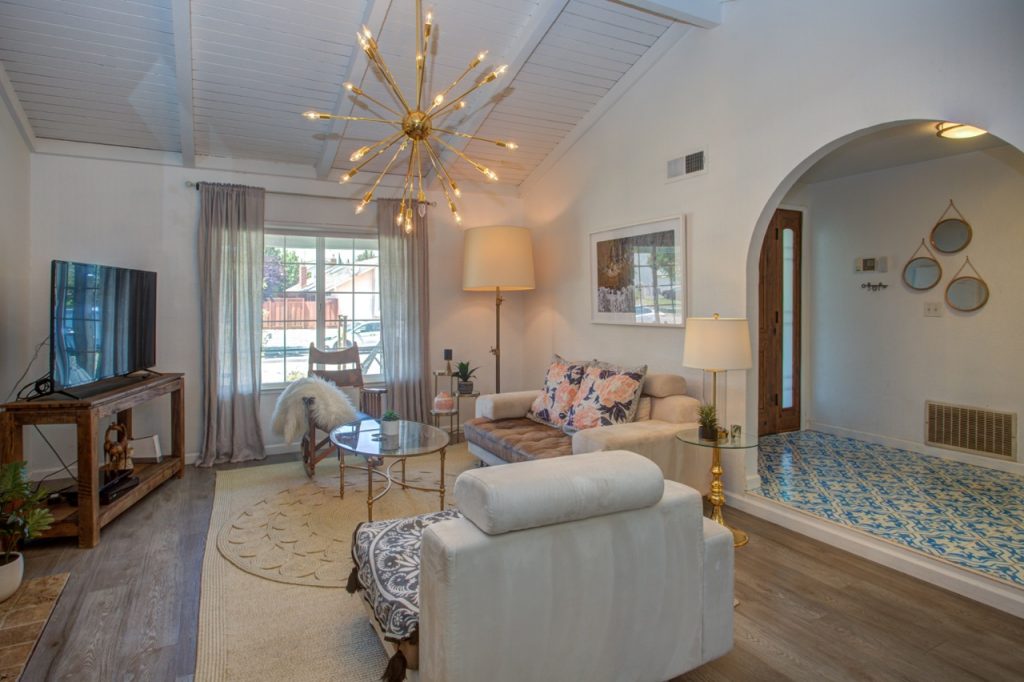
The golden rule of getting ready to sell your house: Prep As If The Scariest Mother-In-Law In The World (Or Maybe Martha Stewart) Is On Her Way Over.

Think about who you would be most intimidated to have over for dinner. Prepare the house as if he or she is coming over, and then prepare it more. Obviously this means cleaning everything within an inch of its life, but beyond that:

1. Pack away anything that doesn’t add to the space. This means clutter, of course, but when you’re trying to make your house appeal to the widest number of people, you also want to remove all things related to animals and babies (yes, yours are cute, but nobody needs to be reminded of litterboxes or the wonders of Baby Einstein when they are looking at a potential new home).

2. Remove 2/3 of the tchotchkes in each room. This means framed pictures, bits and bobs, and definitely the collection of Apple Dolls you inherited from your Aunt Clovis (click the link; they’re terrifying).

3. Leave only the furniture that adds appeal. Some people say that it’s best to show a house completely empty, but that’s just not realistic if you haven’t purchased or rented another place yet. And while select furnishings can help give potential buyers an understanding of how to use the space, you certainly don’t want your furniture decreasing the space’s appeal…so now is the time to toss or store outdated, rickety, or otherwise unpretty pieces. Keep only those items that make the space feel chic and light.

4. Clear out the closets…but not totally. Even if it’s theoretically possible for you to take everything out of your closets during the home-selling process, you don’t really need to – just removing half of the objects in each closet helps potential buyers see (and make sense of) the storage space available.  

5. White and bright and light from top to bottom. If your kid’s room is turquoise or you put a red “statement wall” in the dining room, that’s great. For you. Paint your place white.

6. Spruce up those baseboards. Magic Eraser, heyyy!

7. No grossness. If your bathtub and/or oven are unconscionably gross, put in a new one. It doesn’t have to be expensive. It just can’t be gross.

how to stage your house for a quick sale

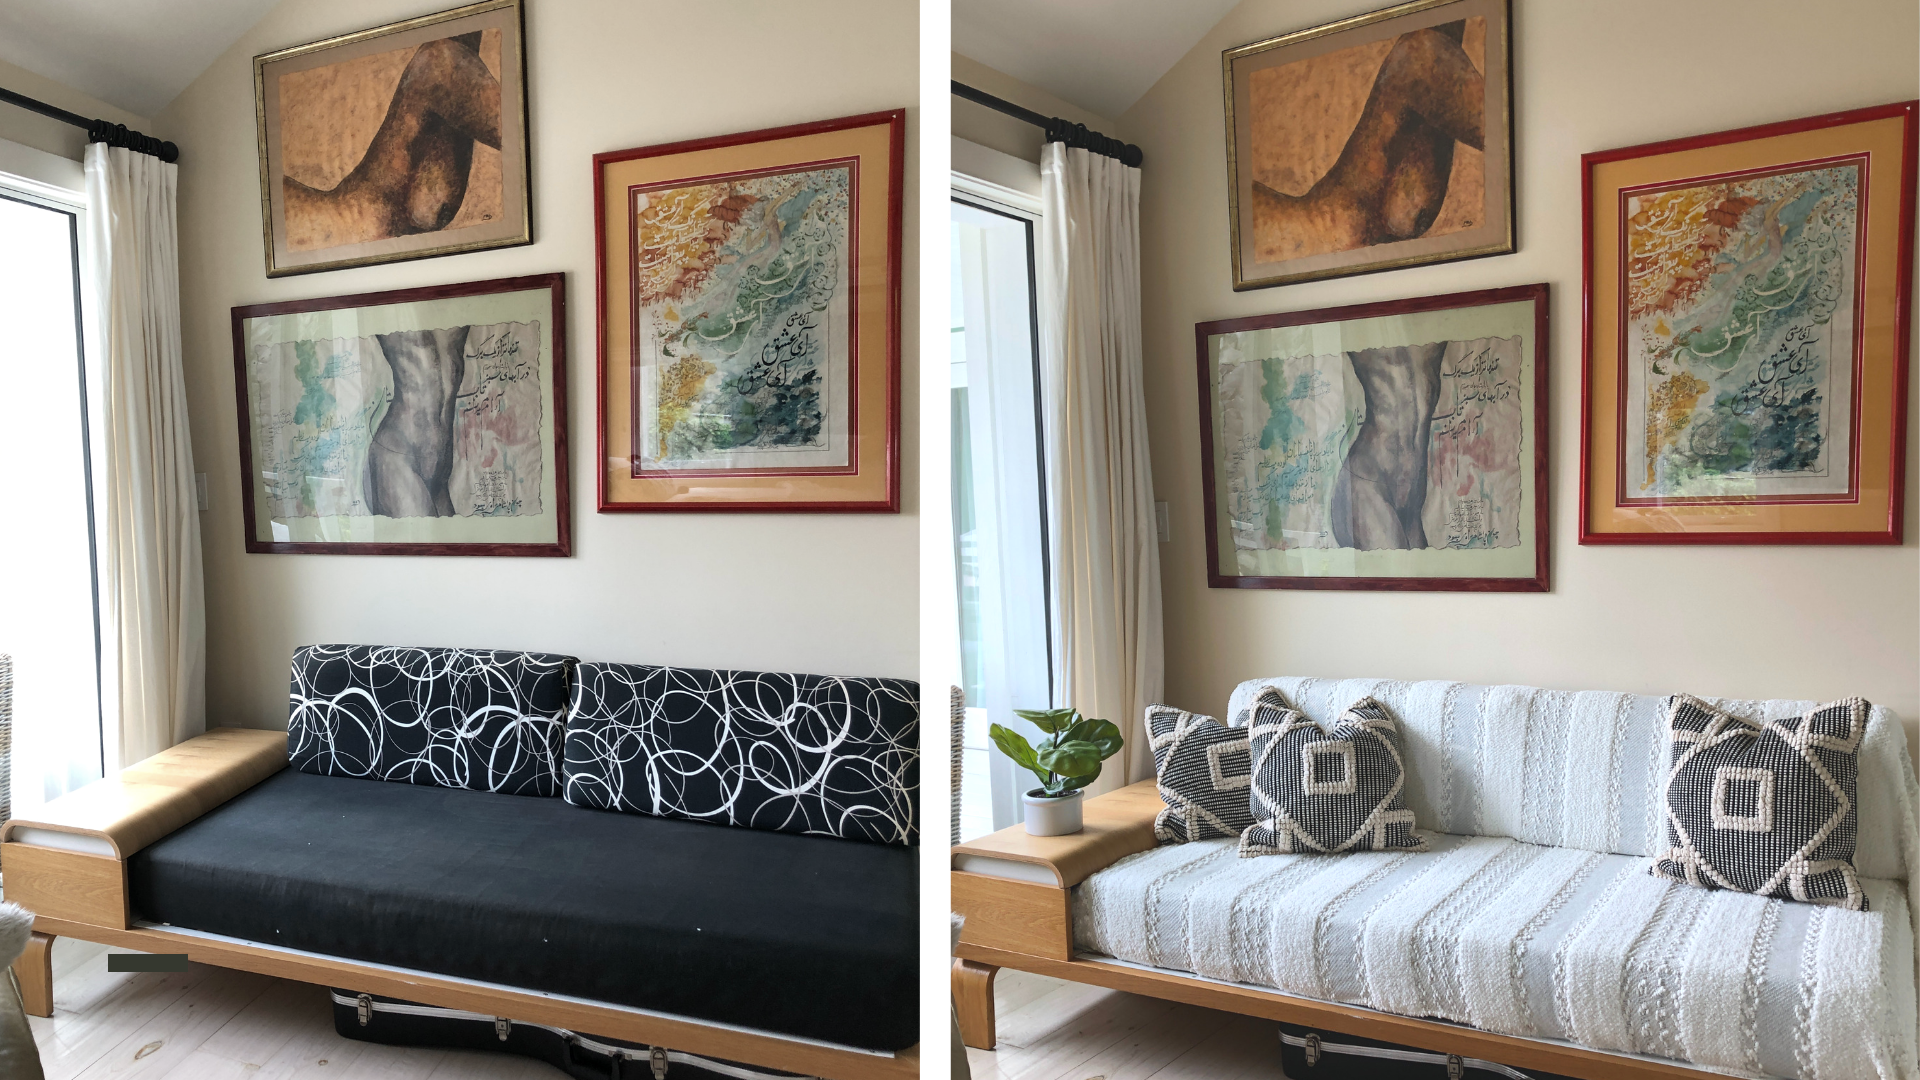
8. Work with what you have. No need to invest when you can MacGuyver, right? In the photo above, a pretty white blanket tucked neatly around a dark, dated futon makes a huge difference in terms of how the room photographed. And to that point, remember that when taking photographs of a space you can always move pieces around to capture the best angles, and reuse things like plants and pillows in various rooms.

9. Plants. Plants (fake or real; choose your own adventure) do wonders to bring life and energy to a space. Another good idea: Add a few pretty, inexpensive annuals out front to add color and up the curb appeal.

10. Consider hiring a professional stager. If you’re moving out prior to the sale and the house will be empty, you may want to hire a company to bring in some simple pieces to make the house look cozy and pretty and live-in-able.

Copyright © 2025 Ren Smith. Site by A+A
Coldwell Banker is a real estate broker licensed by the State of California and abides by Equal Housing Opportunity laws. License Number 01866771. All material presented herein is intended for informational purposes only and is compiled from sources deemed reliable but has not been verified. Changes in price, condition, sale or withdrawal may be made without notice. No statement is made as to accuracy of any description. All measurements and square footage are approximate.